shop local from east coast to west coast,
where to find gleena for the holidays
Looking for some gleena near your home town? Here are a few wonderful stores to check out:
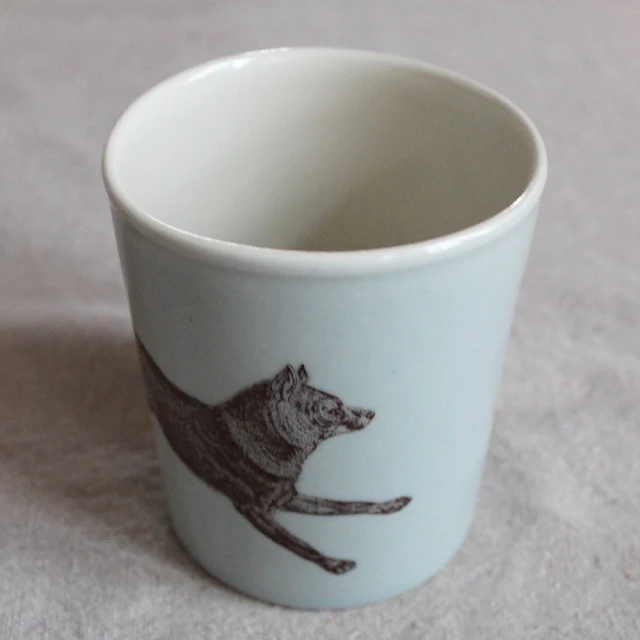
In Brooklyn, NY: Cog and Pearl on Fifth Avenue in Park Slope. Seth and Kristen just received a large order of all things gleena, including the above animal tumblers.
In Eugene, OR: Newtwist on East 5th Avenue. Colleen has a unique collection of gleena bowls, plates and vases.
In Northampton, MA: Kestrel, a brand new store on Masonic Street. Eliza has an amazing eye for exquisite home goods. Check out some gleena serving pieces at her shop.
In Bend, OR: The Feather’s Edge Finery. Steph carries a large selection of the animal and insect tumblers.
In Arcata, CA: The Garden Gate is receiving animal tumblers and roly poly bowls tomorrow, look for them in Kate and Diane’s store toward the end of the week.
In Providence, RI: Studio Hop on Hope Street. Nina has a beautiful collection of gleena bowls, cups and vases. Also, you can meet me there this weekend and next, Saturday and Sunday. Come by and say hello!
All the above stores are run by super talented, and extremely nice people who have become friends over the past few years. I very much appreciate their support. Please shop local this holiday season.
Labels:
gleena,
recommendations
living vicariously through my ceramics
This past September, my ceramics traveled to join eight lucky photographers taking a workshop with Aran Goyoaga at La Manoir de la Malartrie, in Dordogne, France. How I wish I could have been there in person, but receiving these incredible photographs from Aran last night was a very special treat. Thank you so much, Aran!
Please take a look at Aran’s delicious new cookbook: Small Plates & Sweet Treats. Here is an appetizer with a few gleena fern dessert bowls:
Please take a look at Aran’s delicious new cookbook: Small Plates & Sweet Treats. Here is an appetizer with a few gleena fern dessert bowls:
Labels:
gleena,
inspiration
lessons learned when a project kicks your ass for months, and then the client cancels
In 2012 I was contacted by a client who had a large wall with plate railings already installed, that he wanted to see filled with my plates. How amazing is that! Dream job! (or so I thought)
The usual glaze I had developed for my work has a slightly glossier surface than what the client was looking for, he preferred a more matte surface. I felt uneasy about applying a matte glaze to my plates, but ignored the feeling because I was super excited by the project: 200 plates, in four different sizes, all installed on one large wall. Beautiful. Or it would have been: if I had stood up for the glazes I already work with. My glazes are all original recipes that I have developed over the past decade. They work perfectly with my porcelain, which I also mix myself. Feeling invincible, I proceeded to explore totally new glaze colors and surfaces. Without insisting on an R&D, Research and Development, budget!
I spent four months testing glaze recipes from many sources. I tested seven different recipes and 45 different color mixes until I found one recipe that beautifully carried the light colors requested by the client. The surface was a semi-matte. The glaze worked wonderfully on SMALL test plates (5" in diameter) that I used as test tiles. I proceeded to mix two-gallon batches and apply the glaze to the larger plates: 10", 11.5", and 13.5" in diameter. Can you guess what happened?
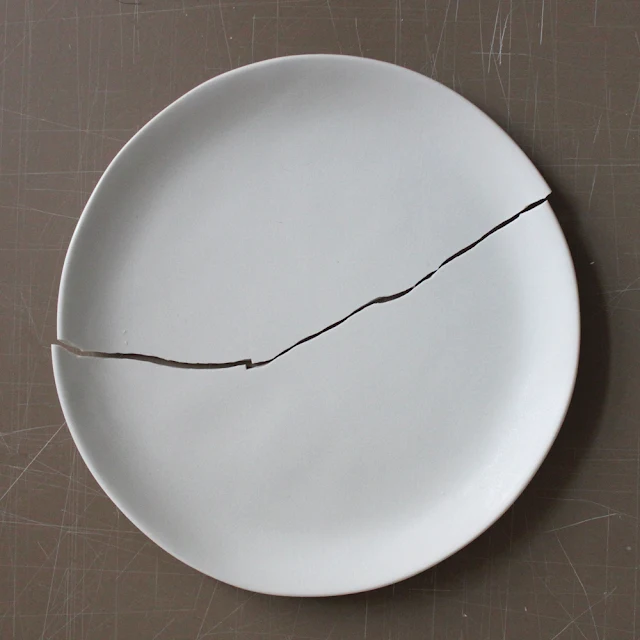
The glaze broke every single large plate in the firing:
I was stunned. I immediately contacted my professor from RISD for help, Larry Bush was a master glazer. (Update: sadly, Larry passed away at the age of 65 a few years later. I miss his mentorship and wisdom) Larry told me that I was crazy (yes, crazy lol) trying to apply a matte surface to one side of a large plate. The shrinkage rate of glaze vs. porcelain puts too much pressure on the piece and cracks it. I never had a problem with the glaze that I usually work with. Again, I should have STOOD UP for my usual glaze. Larry suggested that I glaze both sides of the plates with the matte glaze, and as I don't have a foot on them, here is the process I tried:
1. I applied circular stickers to the bottom of a bisque plate, glazed it, removed the circular stickers.
2. I glued kilnwash feet (a clay mixture that does not stick to the porcelain or the kiln shelf) into each of the circles with Elmer’s Glue. The plates are porcelain, and would sag if I did not have enough support. That's why there are so many feet. Crazy, I know. I was desperate.
This labor-intense glazing process worked, the plates did not crack. They did warp a little, because they were suspended in the kiln on stilts, with the heat and air hitting them throughout the 24-hour firing. Porcelain turns to liquid when it reaches the high temperature I fire to, and is susceptible to subtle movements in the firing. I thought the movement of the plates was lovely, the client didn’t. Again, I should have stood up for my usual glaze, I didn’t.
I kept testing, and finally after many more cracked plates, by accident, got a new glaze to work. This new glaze turned out glossy on a first glaze firing, but then turned satiny-matte on the second, lower temperature fire. I was ecstatic, and as I sat down to write of this success to the client, I got an email from them saying that they are canceling the project. I was too exhausted by this point to argue. But here are the beautiful plates that I came up with for an installation that got cancelled after nine months of really hard research and development:
Did I get a deposit? Yes, I did. Did the deposit cover my expenses for this nine-month-long exploration? Not even close. Here are three very important lessons that I learned from this experience:
1. I should have stood up for the glaze I have been working with for the past ten years. It works and it’s beautiful.
2. If agreeing to test new glazes, I have to request a research and development budget. There must be an understanding that after the research and development stage is finished, there might not be a workable result.
3. For a project this size I must have a contract, spelling out detailed steps of the process, risks involved, and what happens when either the client or I back out.
There was no happy ending to this project, it put me under financially and emotionally, but I did learn a great deal. And, if anyone knows of a wall in need of a sculptural plate installation, give me a ring.
Labels:
observations,
process
in studio: risd’s graduate textile department
Last night I attended RISD’s graduate open studios. As always the work was excellent, the students’ passion for their projects contagious. Entering each artist’s studio was like visiting a macro-planet of visual stimulation.
The textile department’s studios were especially brilliant, with sketches, textures, sculptures, colors, explorations hung throughout. Here are but a few vivid memories:
The textile department’s studios were especially brilliant, with sketches, textures, sculptures, colors, explorations hung throughout. Here are but a few vivid memories:
Labels:
inspiration
at Martha Stewart’s American Made, Grand Central, NYC
gleena ceramics was very honored and proud to have been a part of the very first Martha Stewart American Made event held in NYC’s Grand Central Station. Makers and creators from across the US were honored at the opening party ceremony, followed by two days of demos, classes, workshops, and sales.
Incredible handmade sign, created by the ever talented Martha Stewart crew.
What a treat to spend three days in the beautifully restored Grand Central Station.
Yummy cheeses by Cellars at Jasper Hill.
Gorgeous food and drink at the opening party.
Martha behind colorful ribbons from Studio Carta
The lower 48 states made into cast iron pans, by FeLion Studio, click on image for a larger view.
Lovely hand dipped candles by theBeeman
Breathtaking gardens by Flora Grubb
Perfect sewing kits by Cynthia Treen of Threadfollower
Exquisite ornaments by Vintage by Crystal
gleena was in some pretty amazing company! Thank you to Martha Stewart (who came by to say hello every day) and her incredible staff for putting together something very special.
Etsy was also involved in the event, and it was super fun to meet those responsible for such a fantastic shopping platform. Congratulations to all!
Labels:
gleena,
observations,
sales
visit gleena at the Martha Stewart's Our Finds Marketplace, Grand Central Station, NYC, Vanderbilt Hall
I am super excited to be a part of Martha Stewart’s American Made Workshop on October 17th through October 18th. The event will take place in NYC’s Grand Central Station, Vanderbilt Hall. gleena is a part of the Marketplace, alongside a cafe, a demo station, numerous classes and panel discussions, all lead by MS Living editors. Click here for a full list of events and activities.
Subscribe to:
Comments (Atom)


