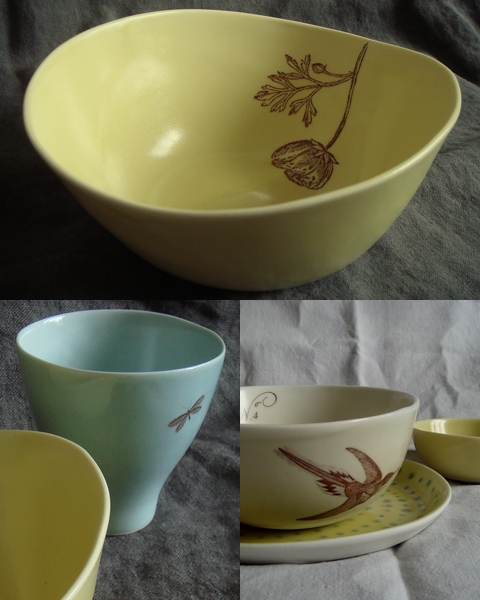
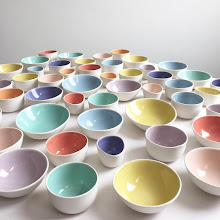
glazing vases


Glazing is a long process, can't say it's my favorite. So much can go wrong, and you don't know that it has gone wrong until the pieces are fired. Dust is enemy No. 1. It can prevent the glaze from sticking to the surface, and you end up with bald spots. Glazing vases is especially tricky. It's hard to get inside to sponge off the dust, so I blow it out as much as I can, and then, well, hope for the best.


This batch came out well, yeay.


Applying the transfers is the next step. Many ask me to explain my transfer process. And all I can recommend is to visit BelDecal. And test their transfers with your clay body and your glazes at your temperature.

My glazes work well with my porcelain. I fire my transfers at a specific temperature that works for my glazes. What works for me will not work for anyone else, as I mix my own porcelain and glazes. I'm not being rude when I say the best way to learn is by trying and failing, and by taking a class. I failed many times, and I spent two years in grad school developing what I do now. And I still fail often. But I still love it, and keep on trying and testing. And when things turn out just right, well... it's like Christmas.

deirdre hawthorne’s sunprints

Deirdre Hawthorne, an artist residing in Northern Ireland, creates exquisite cyanotypes on paper as well as ceramics. Sir John Herschel (mathematician, chemist, astronomer, inventor, photographer, botanist) discovered this photographic printing process in 1842 as a means to reproduce notes and diagrams, as in a blueprint. I have never seen the technique used on ceramics. The surface has to be porous to absorb the chemicals, so Deirdre uses her delicately thin bisque-ware. The results are ethereal, a landscape captured on a three dimensional form.


Deirdre’s prints on paper feel like watercolor paintings, gestural brush strokes of juicy color.


what a treat...

...it is to see my work photographed by my customers. I feel fortunate that my ceramics appeals to artists. Below are photographs from a lovely Franco-Russian blog, veshiwish.


Thank you, Anna, for your support and for your beautiful photography!

simply stunning


Aran, who writes and styles and photographs one of my favorite blogs, Canelle Et Vanille, is publishing a cook book in the fall of 2012. It will be gorgeous, and I cannot wait to see it. And how lucky that some of gleena pieces are used in the styling? The ivory dessert bowls, shown above, are decorated with an illustration by Cynthia Treen. Thank you, Aran, for your beautiful and inspiring work.

i love mud

How inspiring is this Australian company, from their catalogue graphics to their product? I am enamored, and have been for a very long time.


all images are from mudaustralia.com

something about swirls


One of my customers, Leanne, forwarded the above image to me. Leanne created beautiful swirl napkins to match her set of gleena swirl plates. They look fantastic. I love how graphic the napkins are when they are folded. Thank you, Leanne, for this incredible photo!

berries on gleena


It is not a coincidence that my dog is named Berrie, berries are my favorite food ever. And what's better than a collection of berries, arranged on a gleena plate? I can't really think of anything...

This beautiful image was created by Helene from Tartelette.

script dessert plates


A commission of pink dessert plates with antique calligraphy running along the rim.

gleena’s spring dessert plates at gump’s in san francisco


With the grayness and the rain-ness and snowy-ness, it doesn’t feel like spring in Rhode Island today. But these dessert plates, created for Gump’s in San Fran, keep me hopeful for warmth, sun and flowers soon.

a wedding gift serving bowl

The largest of the gourd bowl series, personalized for a couple with a quote from their invitation:


I love the idea of this bowl being used at family dinners, reminding the couple of their wedding day, and of their vows.

new studio


The best part about my new studio is that now everything is in its place. I have room to do all the different parts of the casting process. The process starts by making the original piece, either thrown on the wheel, or carved out of plaster or wood. Sometimes I will make molds from found objects, like the gourd bowls. I make the molds from plaster, two to three of each original shape. Each mold takes a few hours to set up, and a few days to dry.

Then I mix the slip, liquid porcelain, my own formula. I pour the slip into the molds. The pieces pop out, I finish each edge with a sponge by going around and around the rim. The pieces dry and go into the bisque firing. Then they get glazed. If the color is different from inside to out, the inside is glazed first, then dried, then glazed on the outside, and dried again. The glaze fire takes 36 hours, counting the cool-down time.

After the glaze firing, the image transfer is applied, and the piece is fired one more time. This firing takes about 30 hours.

My new studio allows me to move between all the different phases with ease, not having to pack one up to allow for the other. I breathe easier here.

plates, 1-10


A set of custom 10-inch plates, numbered 1-10.

lovely tarts


gleena dessert plate with calligraphy is used on the cover of this yummy book. Photography by Helene Dujardin.

oh moving


The hardest part about moving my studio was packing up all my molds. They are heavy, and fragile. Thankfully, my friend Alec is an expert packer, and created quite a sculpture with the molds he packed. This is just one of the shelving units loaded up. There were three total.