Yesterday I walked into my studio to find Bethanie, the kiln, flashing “FAIL” on her control panel. Not a good way to start the day especially since the kiln was filled with orders that were in their glaze firing. The pieces did not reach the necessary high temperature, and look all shriveled up and color-less.
Bethanie’s “fail” message pretty much summed up the day to follow: I had another failure casting the large boat vases I have been working on for months. Huge cracks formed on the sides, as the porcelain was not shrinking off the mold evenly. Sigh. That was my fourth attempt. Coincidentally, a potter from Austen, TX wrote me asking for my advice on her plate molds. Her pieces were forming huge cracks as they dried in the molds, too. Needless to say, I did not have a solution for her, but wait, maybe I do now...
Today I walked into my studio to find the vases dried off the mold perfectly! Tears of relief welled up as I popped open the molds. Here is the result, next to it’s wooden original. Whew.
How did I finally achieve this, you are asking? Simply by dusting the mold with a light coating of Nepheline Syenite (no, it’s not something you find on the ingredient list of Twinkies, but a genuine mineral). This trick was suggested by my former professor at RISD, Larry Bush, so I can’t take the credit. My somewhat uneducated guess is that the fine particles of Neph Sy allow the porcelain to slide along unhindered as it dries and shrinks in the mold. Oh happy day.
As for Bethanie’s “fail” message, once I stopped hyperventilating, I looked it up in the manual. It meant that I needed to replace the thermocouple. All that drama for a simple fix. If any Skutt Kiln techs read this, please consider programming something like “time to change that pesky thermocouple, don’t panic” instead of “FAIL” into the control panel. Gentler wording might prevent a heart attack... just puttin’ it out there.
thank you Apartment Therapy!
This week is DIY week at Apartment Therapy, and I am grateful that my dessert plate process (shown below) was featured. Thank you Sarah Rainwater, our very own Providence correspondent for AT!
Labels:
gleena
small swirl plates
For the past few months I have been working on a new shape of plate. A small plate that can be used for a salad or dessert. I was motivated by a client who liked the swirl plates, but requested a set of eight slightly smaller and the swirl in a variety of bright colors. A good challenge, making a new plate shape from scratch is time-consuming.
First step is to pour a block of plaster, and carve it to the shape I want. I use stainless steel sheeting due to its bend-ability. It works well to create round shapes.
After the original is carved, I make a set of casting molds, or negatives of the original shape. Before I can start pouring in the porcelain, the molds have to dry, which takes a few weeks.
When the porcelain is poured, the sides are always a mess and need cleaning. I don’t mind this step as it gives me the opportunity to create a variety of edges, making each plate unique.
The cast porcelain takes a few days to dry out before it can be fired for the first time.
The swirl is painted on during the "green" stage, when the plate is dry, but not yet fired. The color appears dull at this phase, but that will change in the firings: a bisque followed by a high-fire glaze.
In the glaze firing, the porcelain turns white, and the swirls brighten to their true color. I’m happy the way this particular clear glaze retains the color’s juiciness and makes it look like watercolor.
The final plates are a handy 7" in diameter, perfect for a slice of cake or cookies. Click here for ordering information.
true blue
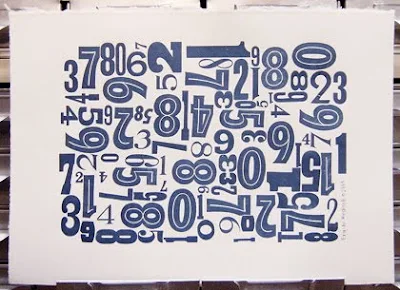
Created on an antique Vandercook printing press, this lovely numbers print is available on etsy in inkywinke’s shop.
Labels:
typography
fig vases
The large vases are finally done, and I’m happy with the way they turned out. So much could have gone wrong in the making process, but all went as planned. Even the glaze behaved. Click here for the making details. I’m calling them “fig vases” for their shape and for my favorite fruit.
colors and shapes of jars ceramics
Images courtesy of Jars Ceramics
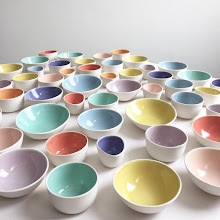
Founded in 1857 by Pierre Jars, Jars Ceramics continues to create modern, functional and stunning tableware. The shapes and glazes are an inspiration and I love the company’s philosophy:
Jars France Ceramics’ unique tableware concept combines authentic simplicity and contemporary design for every day use. While preserving their legacy of hand craftsmanship and high quality materials, Jars products are in perfect harmony with modern lifestyles.
Labels:
ceramics,
inspiration
the month of molds
January was a month of making plaster molds. Remember these shapes?
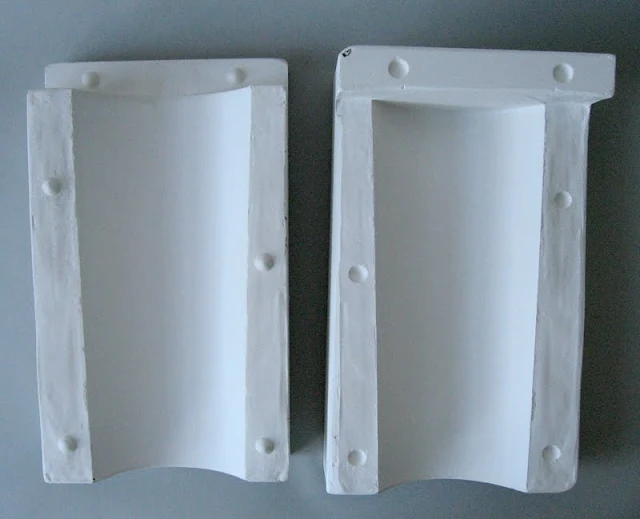
I finally finished sanding and sealing the wood with polyurethane to get ready for making the molds out of plaster. I started with the largest shape. It is a two-part mold, and half of it was made first:
This plaster half was then sealed with mold soap, and set up with coddles (the wooden parts) to pour the second half:
The two parts have to dry out completely before I can start casting with porcelain. The vase will be 15"h and 6" across, and I will start casting it next weekend. I can’t wait.
Subscribe to:
Comments (Atom)


